


I finally did something this past weekend that I have been wanting to do for years…literally years! I made an Tufted Upholstered Headboard.
If you have been thinking of making your very own Upholstered Headboard, I want you to be encouraged and not apprehensive to try it yourself.
FYI – One Kings Lane has loads of fabulous upholstered headboards at great prices as well if you don’t want to make your own. I spotted prices as low as $259.00.
I think I waited so long because I knew I wanted to make one with button tufts. And, to be honest, I was a little intimidated with that part. Now, after finishing….and learning how to easily cover my own buttons, I am so glad I finally dove in and did it. I am thrilled, thrilled, thrilled!
I checked out fabric at Hobby Lobby and Joann’s Fabrics on Friday and found one I really like on the clearance rack at Joann’s. Woo Hoo! It’s a cream chenille-like fabric with a little texture. Perfect for our room that is painted a tan.
The whole project cost $127.00 . It would have been a little cheaper if I had not misread the price of the wood I chose. After it was already cut and I was at checkout, I found out that it was $15.00 more than I thought. On the plus side, it’s Formaldehyde Free and Hubs is happy about that!
Here is the breakdown of what I purchased for a King Size Upholstered Headboard:
1 piece of ½″ plywood or MDF (cut at Home Depot to 78″ x 35″….they will cut for you!) – $43.97
2 ½ yards of Fabric of your choice. (I found mine at Joann’s Fabrics on clearance for $9.00/yard) – $22.50
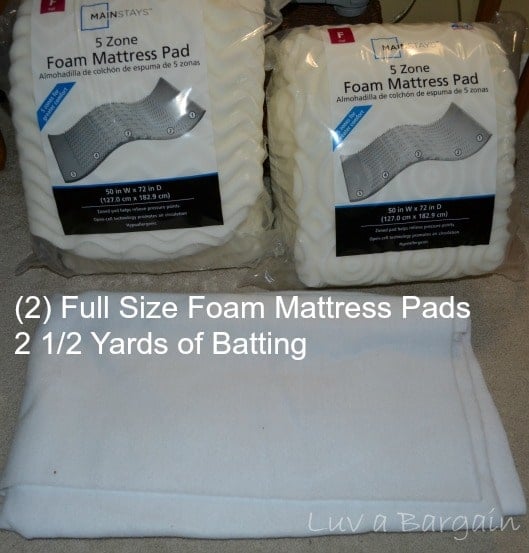
2 ½ yards of Batting – (Joann’s Fabrics) for $7.99 / Yard – $11.50
(2) Full size Foam Mattress pads(Walmart) – $11.94 each – $23.88
(3) pack of Button Cover Kits (Walmart) – $1.97 each – $5.91
1 pack of Doll Needles (Walmart) – $1.77
1 spool of Upholstery Thread (Joann’s Fabrics) – $3.99
1 French Cleat for Hanging (Home Depot) – $14.97
Other Materials Needed:
Jigsaw
Staple Gun
Staples
Scissors
Paper

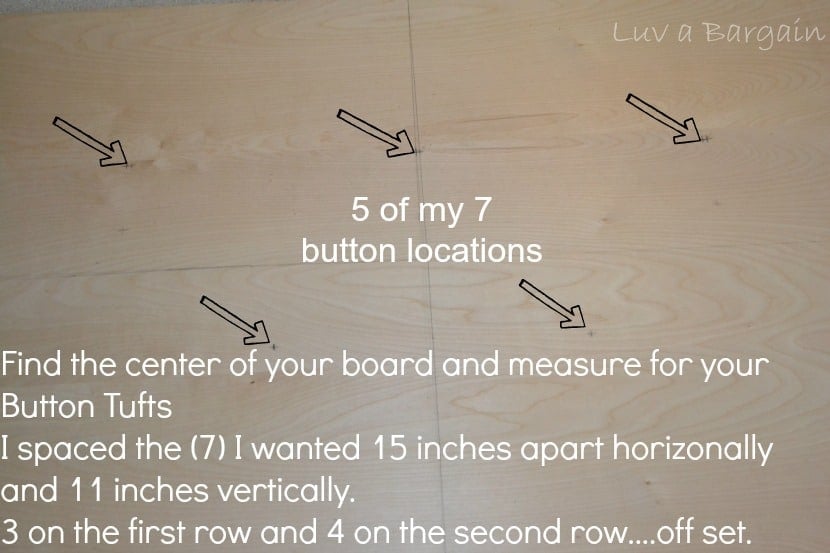
Find the center of your board each direction. This step honestly took me the longest. I had to re-measure a few times. Note my double lines that would not seem to erase completely. *Insert expletive!* Sorry I did.
I started my first button 11 inches from the top of the headboard in the center and marked the first button location. Then I measured 15 inches to the left and 15 inches to the right on that line.
The I measured 7.5 inches over from the center and 11 inches down and so on to get all the button locations perfecto. Again, this was the most time consuming….probably 30-45 minutes.
Then you will need to drill through each of these marked locations with your handy drill to attach the buttons.
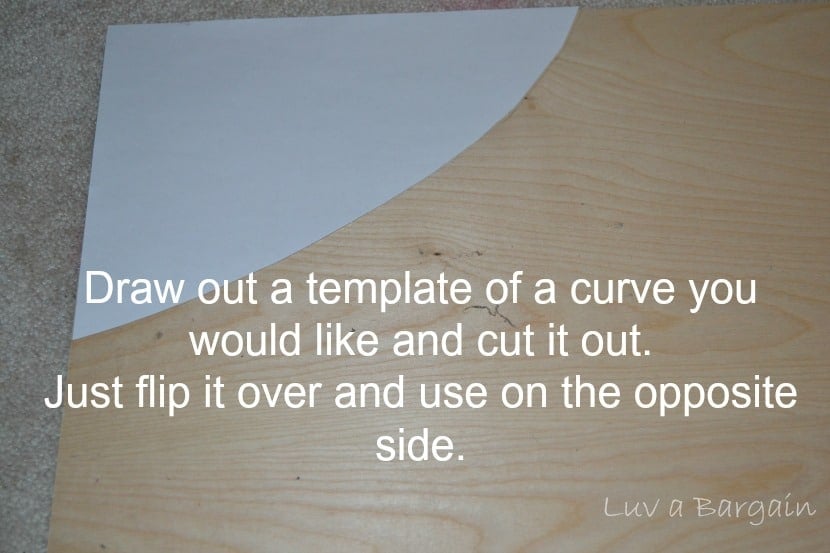
Next, you need to decide if you want any kind of curves on your headboard or just keep it a rectangle. I wanted a little curve, so I used a simple sheet of 8 x 11 paper and drew an arch and cut it out.
You will only need one template. Trace it onto the wood on one side. Then flip it over and trace the same template onto the other side.
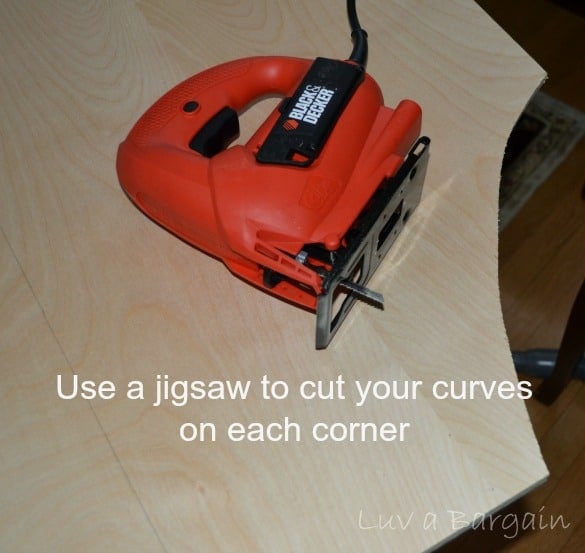
Grab your jigsaw and cut each side out.
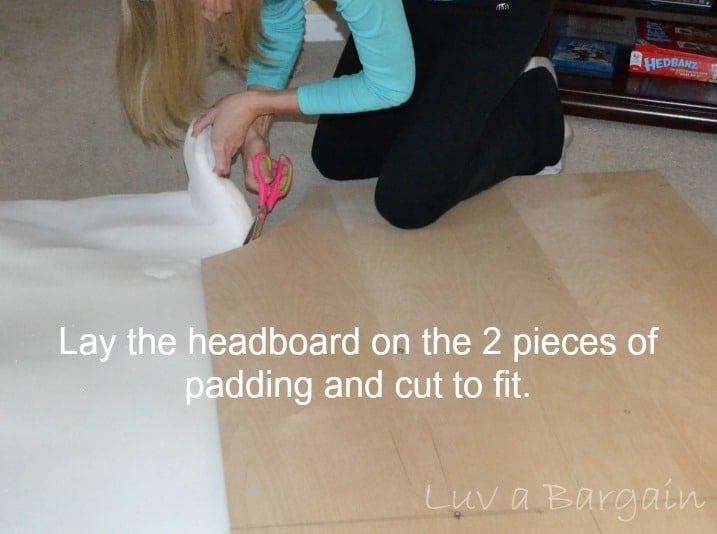
Lay out the foam pads on the floor with the “bumpy” sides facing each other. Lay the board over the foam and aline one side and bottom.
Cut off the excess around the curved corners and across the top. You will need to use this excess part to fill in the opposite end of the headboard. The full size foam pad is 6 inches short. Just cut it to fill in that section.
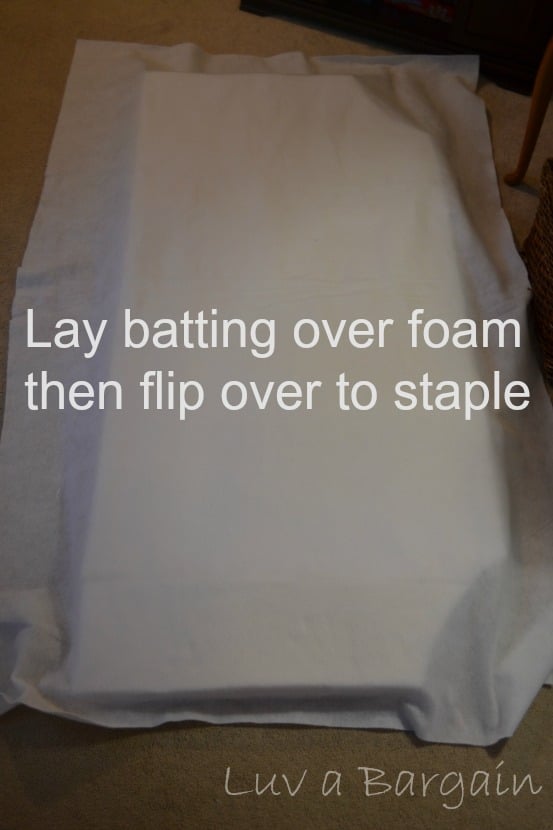
I flipped everything over and laid the batting over everything. Then tucked in the bottom and flipped it carefully back over.
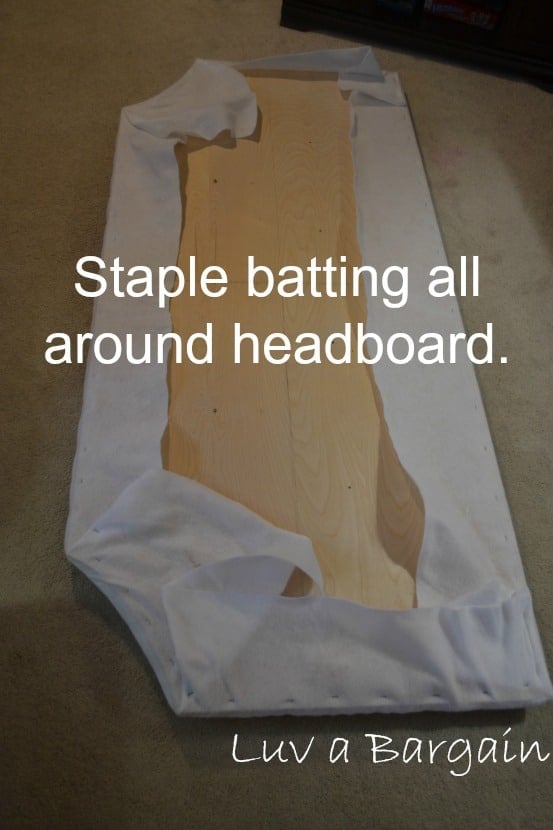
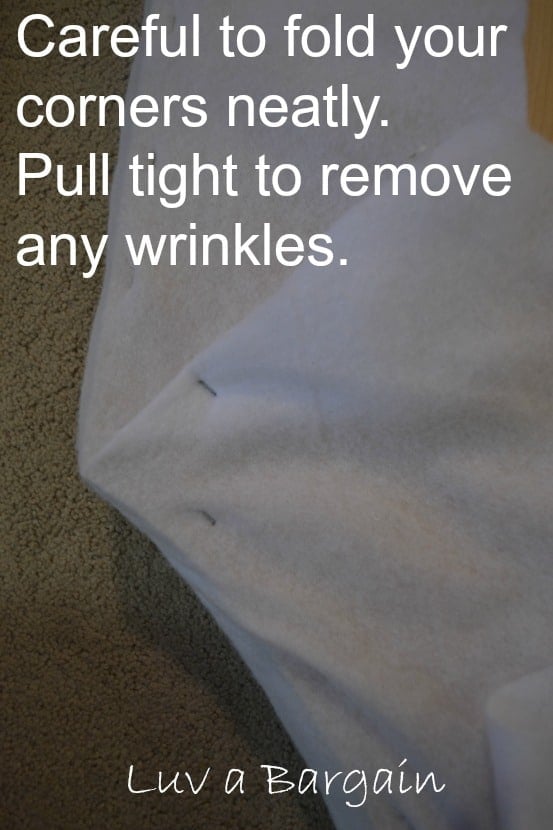
Start stapling the batting onto the board. I started across the bottom in the middle and worked my way around to the first corner. Carefully fold the corners so you have no bunching. It’s easier than you think. Pull tight as you are stapling to avoid getting any wrinkles as you go all the way around. I even went back around and put more staples.
Lay your fabric down under the board and repeat your stapling pattern. Careful to pull any wrinkles out. Be sure to iron out any big wrinkles before staples it on if necessary.
Next start making your buttons with the button covering kits. This was so much easier than I thought it would be. The fabric I chose is notre ally thick so that does make this part easier. If you choose a thick fabric, the buttons may be just a little more challenging.
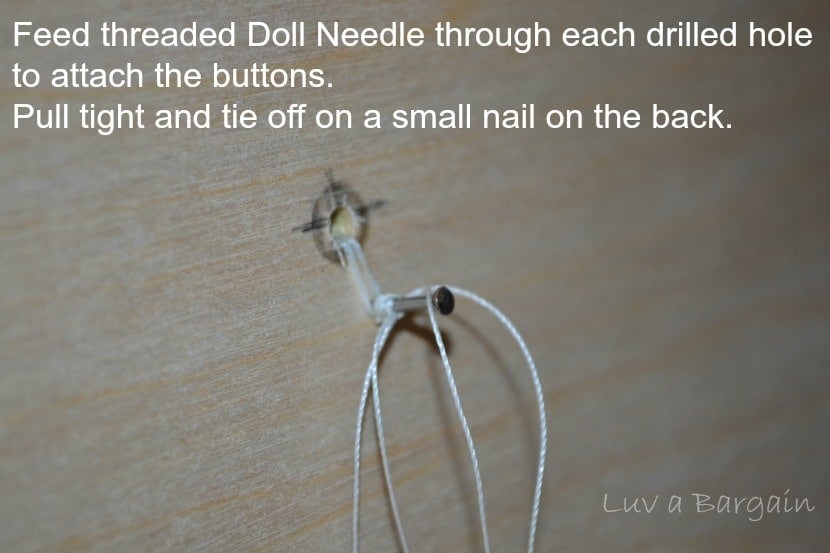
After you have covered all of your buttons, thread one of the long doll needles with about 3 feet of the upholstery thread. This thread is much stronger and your chances of breaking it are less when pulling the buttons tight.
Feed the needle through each drilled hole. Run it through the button back and then feed it back through the drilled hole.
Then simply pull tight to create the tuft that you want. Tie the thread in a double knot around a finishing nail that you can nail right into the back near the drilled hole. This was an after thought because my tufts was not holding like I wanted them to.
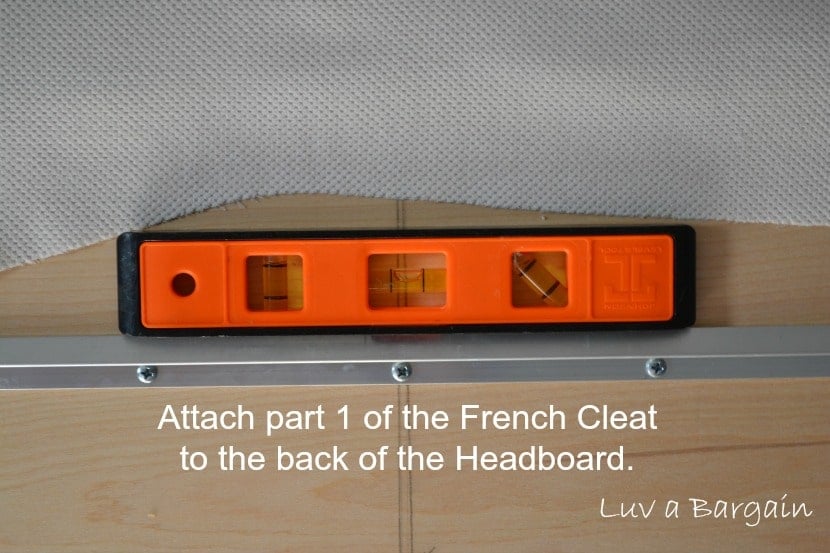
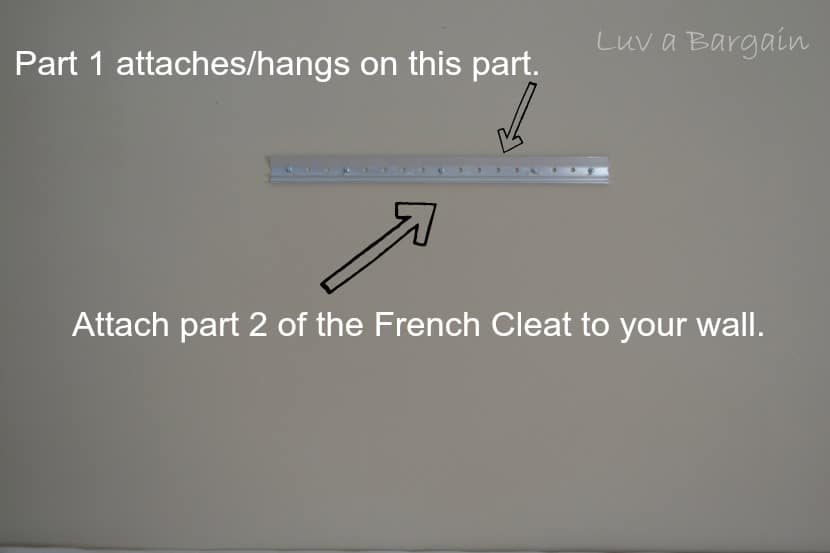
Attach the French Cleat for hanging it above your mattress. The one I bought at Home Depot came with a little level in it to make sure that everything is hung correctly with no slants.
Happy Dance!! I love it!


Susan
Formaldehyde Free wood in your headboard sounds like it’s more than worth the extra $15. You did such an amazing job with your headboard. I’m intimidated by the idea of attempting one. I’ll just sit here and admire the one you made! Thanks for sharing at Inspire Us Thursday on Organized 31.