

I am so happy to share this Chalk Paint Tutorial and TV Stand Makeover that I finished last week. Using chalk paint is so easy with gorgeous results! No prepping, no sanding, no priming!

Last week I gave you a little sneak peak of a something I was doing on our Facebook page. I’m happy to report that my little project is now complete and I couldn’t be more excited with how my TV stand makeover turned out!
I have seen so many chalk painted pieces of furniture on Pinterest over the past year or so. My eyes kept gravitating to those painted in pretty blue tones. I just knew that one day our TV stand would look so much prettier in one of those colors.
I bought this TV stand at Big Lots several years ago. It is not even real wood! But it was cheap ($60 cheap) because it was the floor model and had a few dings on the side and feet. That didn’t scare me away because most things in my house will get more dings over time anyway. Plus I knew that one day it would get a coat of paint of some color to “fancy” it up a little.

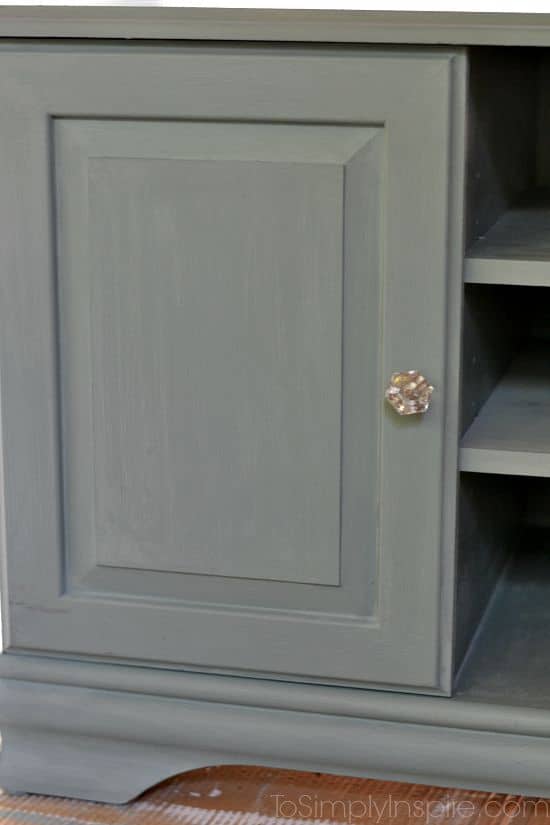
This was my very first time using chalk paint! I used Annie Sloan Chalk Paint. The color I used is Duck Egg and I used the clear wax as the finish. I bought the dark wax as well but haven’t decided if I want to use it quite yet. The dark wax would add an even more antiqued look. I’m still pondering it. 🙂

That is what is SO great about chalk paint! You can use it many different types of finishes. No prepping, no sanding or priming. The paint is very, very flat by itself. And it’s also very thick paint so I did add a little water to the paint to thin it.
There is a wax that you use is the finish that gives you whatever degree of shininess that you want. The more you buff the wax, the shinier it gets. I opted for a medium shine instead of a higher gloss finish.
I did not buy the Annie Sloan brushes. I had done a little research online and found that many people were using the really cheap chip brushes with success. Or a Purdy XL brush was used by many too. I knew I wanted the brush stroke look on the wood so I went with the cheaper one. I love how antiqued it looks with the brush strokes.
The first coat goes on fairly thin. But it adheres really nicely to the “fake” shiny wood. Like when applying other paints, paint in the direction of the grain in the wood.
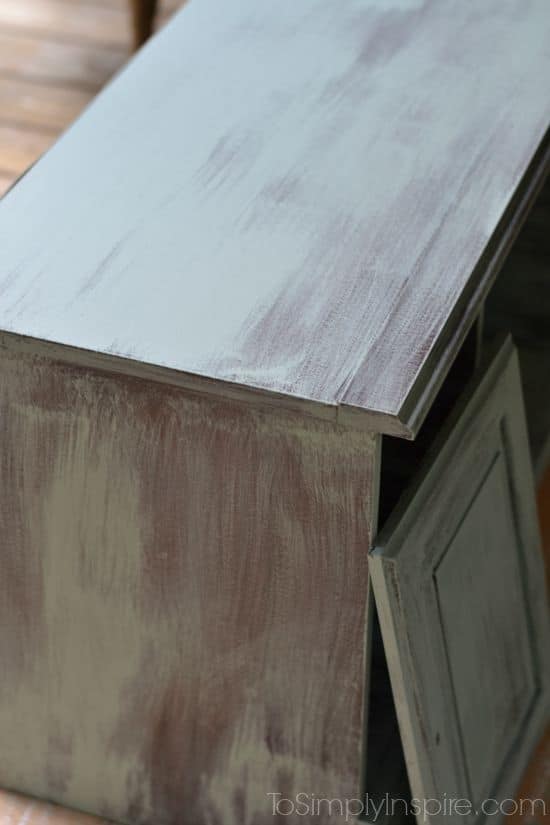
The second coat gives you an much better idea of what your final project will look like. I ended up applying 3 coats of paint and 2 coats of wax for extra protection.

After allowing the paint to try overnight, I applied my first coat of wax the following day. The wax has a creamy texture (almost like crisco). I applied a thin coat of wax with an old t-shirt. DO NOT overdo the wax. If too much is applied, it will feel extra sticky. A little goes a long way. I actually put a few spoonfuls on a paper plate and wiped little bits onto my rag to control how much was going on.
Apply the wax in the direction of the brush strokes. You can start in circular motions, just finish in the direction of the brush strokes. (sorry I failed to get a picture of applying the wax)
Allow the wax to dry overnight as well. You can buff after one coat wax. But I applied a second coat first and then allowed to dry again overnight. Then I buffed to a medium shine. Just rub over all the waxed area with a clean cloth applying medium pressure to create the shine you desire.
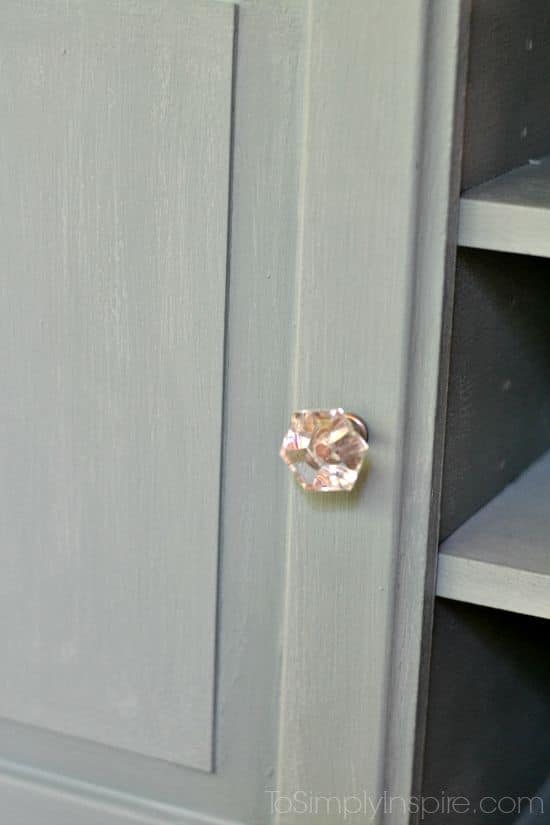
I found these adorable little acrylic glass-looking knobs at Target to put back on instead of the silver ones with came on the TV stand originally. LOVE them too!

If you have a older piece of furniture or a piece that you just want to spruce up and change the color, I highly recommend chalk paint!


LaDonna
I have a piece very similar to this one that I’m trying to redo. I bought Valspar Ultra Interior + Primer in Satin. I lightly sanded the surface and brush painted one coat. I let it dry overnight. I laid the doors on top of the cabinet for an hour or so and when I moved them, some of the paint chipped off the cabinet . This is my first piece I’m redoing and I don’t know what I should do now. Any advice would be greatly appreciated.
Debby
Your projects turned out great. I’m wanting new bedroom furniture, thinking on painting it as it’s whicker. Maybe too big of a project but who knows.
Kay Ward
I have just a piece identical to yours. It is
I just “completed” a piece which is identical to yours. Come to find out, I’m not through with it like I thought I was. You called your piece “fake wood” and I call mine laminate over fake wood. I read a lot on Pinterest about painting laminate and they all required a certain type of primer. I had bought a chalk paint from a friend and was advised it did not need to be primed, even though it was laminate. WRONG!! The paint scars too easily. I am unsure what to do. I bought the special primer and had decided to start over. I have not as yet. Any advice you would care to offer? I would appreciate anything you might want to share with me.
Thank you!
——
Sherri
So sorry you had trouble with your piece. You may have to sand it (with a fine grit sandpaper) to help the primer adhere. (If you have a hand sander, that would be faster of course)
Robin G
Nice and simple directions. I am looking to re-do our TV stand. Certainly will attempt this!
Kelly
Love the colour!! Looks great. I am keen to try chalk paint but wanted to ask – did you do any prep work (sanding etc)? I have a tv stand that is chipboard covered in laminate and am wondering if chalk paint will work….
Sherri
Thank you so much! I did not do any prep work at all. My TV stand sounds just like yours and it did work fine. But if you want to be extra safe, you could go over it with a fine grit sanding block. I love how it turned out so much.
Mar C
Chalk paint is the best! Great makeover and so fast and easy! Really nice!
Sherri
Thanks so much Mar! I love how it turned out 🙂
Jann Olson
What a difference this make over made. Love the new color! I love using chalk paint as well. Thanks for sharing with SYC.
hugs,
Jann
April J Harris
Your TV stand looks gorgeous! I haven’t heard of the chalk paint before – it looks wonderful! Love the door knobs you used as well. Thank you for sharing this project with us at the Hearth and Soul hop.
Angela @ Setting My Intention
That turned out so well! I’ll keep this in mind for future pieces of furniture. Thanks so much for sharing at the Let’s Get Real Link Up!
Renee Cook
So Cute!! I haven’t tried chalk paint yet – a little behind 🙂 scouring CL for a dresser to try this with! Pinning this for future reference.
Audra @ Renewed Projects
Gorgeous color! Duck Egg is my favorite Annie Sloan color. It really brightens up the corner well.
Mary
It turned out great! I am always amazed at what paint can do. I too love chalk paint . It is so simple to use and looks amazing. I’m so glad I saw your post at Create It Thursday
Kelli
That turned out great! love it!
Christine
Super job, I love Annie Sloan too!!!!