


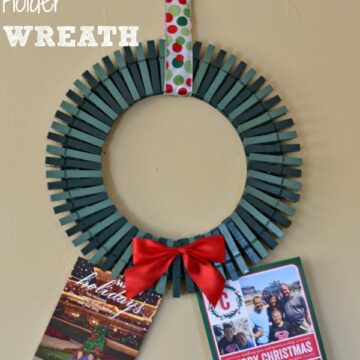
Make this adorable and easy DIY Christmas Card Holder Wreath to display all the great photo cards you receive each year.

Don’t you love receiving all the photo Christmas cards in the mail every year. They are starting to roll into our mailbox already! (my super organized friends are way ahead of me!)
I have always wanted a cute way to display them so we could honor them much better than we have in the past. So little Miss and I set out to create something fun to hang in our kitchen.
Pinterest inspiration here we come. Then, this DIY Christmas card holder wreath called our name and off to Hobby Lobby we went to buy most of our supplies. (remember, always take your coupons to the craft stores) I picked up the clothespins at Walmart. You can also get the spray paint there or at home depot as well.
I spray painted everything with a couple of coats on Sunday. Then hot glued the clothespins on today in about 30 minutes. Added the ribbon and bow. It’s one of the easiest, most loved crafts we have made!
SUPPLIES
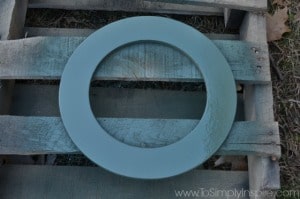
1 12″ Chipboard Icon Wreath (it looks like cardboard) I got mine from Hobby Lobby but Michael’s has them too.
1 can of dark green satin finish spray paint (of your choice)
1 can of lighter green satin finish spray paint (of your choice)
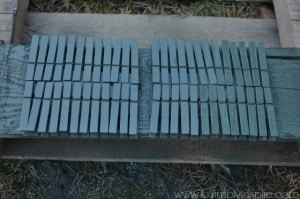
100 clothes pins (you will use about 75)
Ribbon on choice (I picked my favorite…polka dots!)
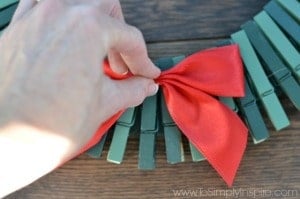
Small red bow (I used on from our Christmas decorations)
How to Make a DIY Christmas Card Holder Wreath
Spray paint the cardboard circle with either color of green you would like.

Spray paint half of the clothes pins dark green and half of them the lighter green.
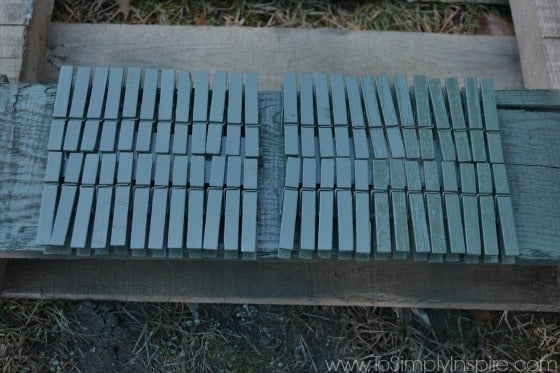
Let dry for several hours
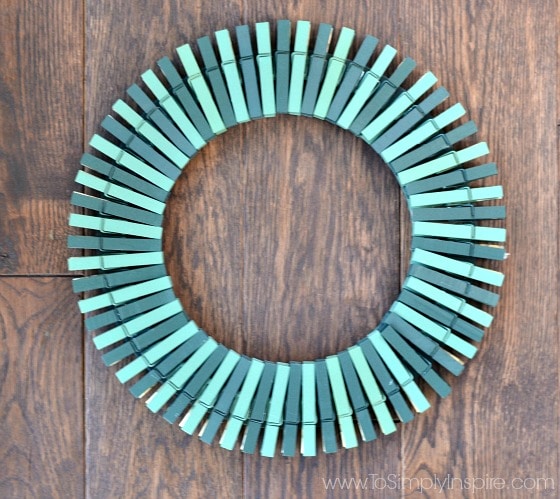
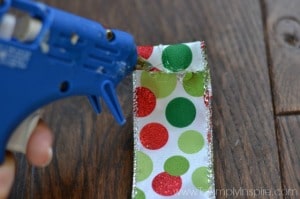
Apply the hot glue to the top half of the clothes pins …one at a time and place them around the wreath with just a little bit of an overhang on the inner part of the circle.
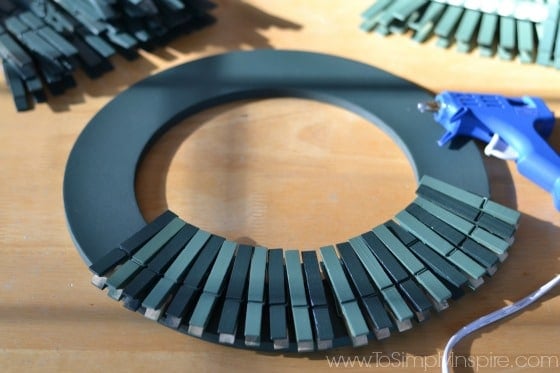
Continue by alternating the clothes pins all the way the wreath.
Apply hot glue to the back of the red bow and place in toward the middle bottom of the wreath.

Cut about 2 feet of ribbon and wrap it around the top of the wreath.
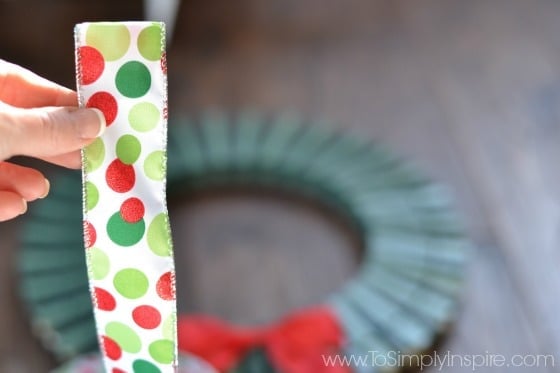
Fold the bottom ribbon over the top ribbon section and apply hot glue to the seam.
Then fold that section over one more time to create a nice looking seam.

Hang wreath with a push pin placed through the top of the ribbon.

Start pinning all those great cards all around the wreath as the come in.

DIY Christmas Card Holder Wreath
Equipment
- Glue Gun
Ingredients
- 1 Chipboard Wreath
- 1 can dark green satin finish spray paint
- 1 can lighter green satin finish spray paint
- 75 clothespins
- 2 feet 2 inch thick Holiday themed ribbon any color of choice
- 1 small red bow Christmas decoration works great
Instructions
- Spray paint the cardboard circle with either color of green you would like.

- Spray paint half of the clothes pins dark green and half of them the lighter green.
- Let dry for several hours
- Apply the hot glue to the top half of the clothes pins …one at a time and place them around the wreath with just a little bit of an overhang on the inner part of the circle.
- Continue by alternating the clothes pins all the way the wreath.

- Apply hot glue to the back of the red bow and place in toward the middle bottom of the wreath.
- Cut about 2 feet of ribbon and wrap it around the top of the wreath.
- Fold the bottom ribbon over the top ribbon section and apply hot glue to the seam.
- Then fold that section over one more time to create a nice looking seam.
- Hang wreath with a push pin placed through the top of the ribbon.

- PIn your beaufitul photo cards on as you receive them.


Nutritional Disclosure
Nutrition information is automatically calculated and should only be used as an approximation.

Ella
It would be so great if you’d stop by my Wonderful Wednesday Blog Hop tonight. thanks for sharing with Hearth and soul blog hop, featuring on this week’s blog hop.Thanks for joining the Inspiration Spotlight party. Happy Holiday season. This is such a great way to display all those Christmas cards you get every year.
Smith
Hello!
It would be so great if you’d stop by my Wonderful Wednesday Blog Hop tonight. thanks for sharing with Hearth and soul blog hop, featuring on this week’s blog hop.Thanks for joining the Inspiration Spotlight party. Happy Holiday season. This is such a great way to display all those Christmas cards you get every year.
Ducks n a Row
Oh I love this! Pinned it — would be so great if you’d stop by my Wonderful Wednesday Blog Hop tonight (we go live pm ET Tues) to share this!
Sinea ♥
Sadie Seasongoods
This looks great! The different shades of green REALLY makes it pop- love! Thanks for popping by Snickerdoodle Sunday- hope to see you again tomorrow!
Theresa @DearCreatives
This is a great DIY. PInned & shared. Thanks for joining the Inspiration Spotlight party. Happy Holiday season!
swathi
Beautiful, thanks for sharing with Hearth and soul blog hop, featuring on this week’s blog hop.
Ann
How pretty and unique! Thanks for linking up at Frugal Friday! 🙂
Celeste
This is such a great way to display all those Christmas cards you get every year! So creative and festive!