

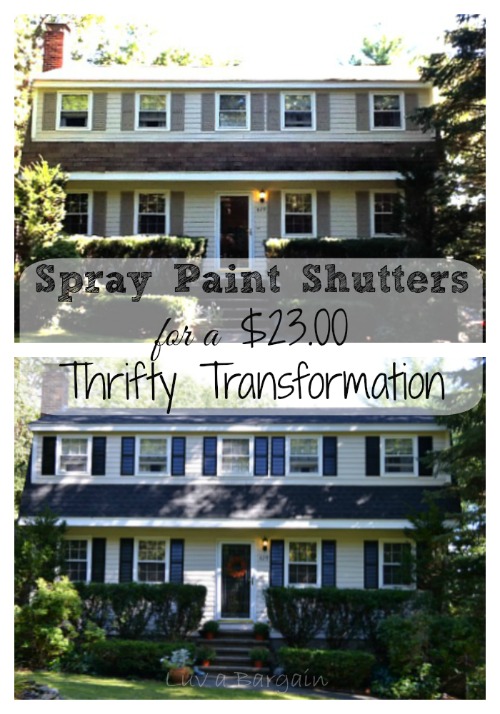
Updating old shutters by spray painting them is a great, inexpensive way to bring a fresh look to the exterior of your home.
I mentioned Friday that we had a very busy week last week. One of the projects I did was painting our front door black. But….I also spray painted ALL of our shutters black too!
It’s something I have been wanting to do for a very, very long time. But I had to enlist hubby’s help in dragging our humongous ladder and removing the shutters first. Since we were getting our roof replaced last week too, I knew I could convince him now would be a fabulous time to help me. I’m the lover of projects in this house. Hubs just goes along, thankfully, when I need help.
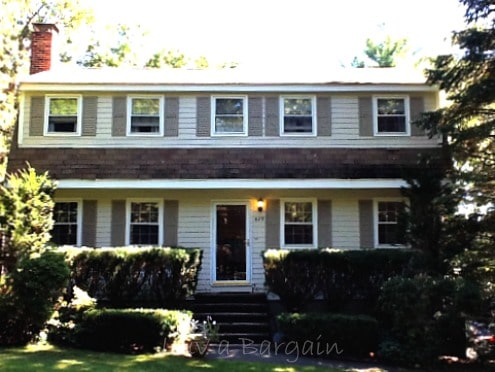
So, here is the lovely before picture. We bought our house in 2005. The previous owners had painted a LOT of everything a beige / tan. The roof is (was) brown too. The deck was painted a beige color. I didn’t mind it but always had a bigger plan.
I had looked into replacing the shutters first. But new vinyl shutters were going to run between $35 – $42 per window! For our house, it would have cost $343.00, which was not in my budget.
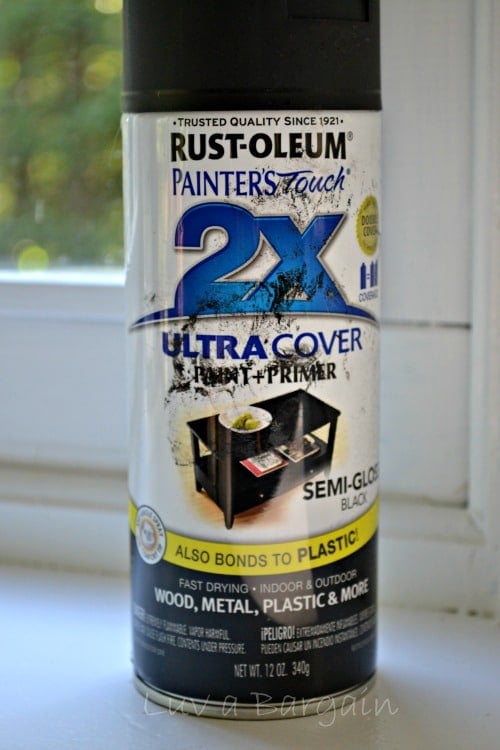
I hightailed it to Home Depot and bought 9 cans of this awesome spray paint for just $3.87 per can. Rust-Oleum Painter’s Touch 2X in semi-gloss. It has primer + paint! Bonus! I ended up only using 6 cans for a total of $23.22!
That right!! Just $23.00 for this HUGE transformation!
After removing the shutters, I wiped them all down with a wet rag to remove any dirt, bugs, and spider webs.
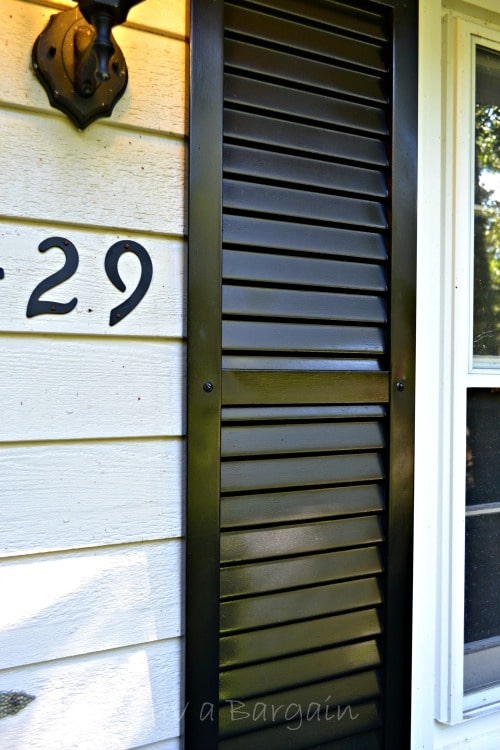
Disclaimer: Our shutters are old metal shutters and this spray paint worked wonderful. It says on the can that it works on plastic as well though.
- I laid all of the shutters, all 18 of them, on a big tarp in the front yard, I put on my lovely ventilation mask and started spraying. I highly recommend buying the spray can gun attachment. It saved my finger tip tremendously. Also, be sure to wear latex gloves to keep your hands spotless. (almost) I also completely forgot to take pictures during my spraying.
- I started spraying along the edges first, holding the can about 6-8 inches away from the shutter. Then I sprayed all the way down the sides and across the top and bottom next.
- Then, I sprayed the louvers starting and the top of the shutter and working my way down.
- Next, I walked around the shutter and lightly went over any spots I saw where the louver meets the sides.
- I took me about 5-10 minutes per shutter.
- I let them dry for 2 hours and we started hanging them back up.
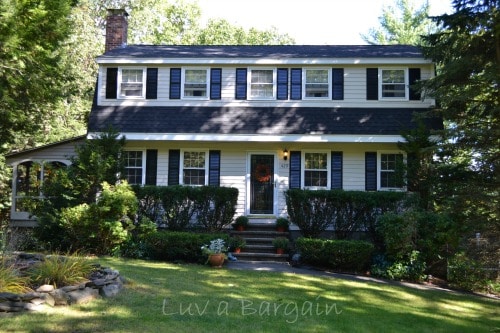
I am so excited at how they look! So clean and fresh. They just “pop” on the tan house. Two of my favorite color schemes are a Tan house with Black Shutters or White house with Black Shutters. I had the latter on our house in NC. Now I have the other fav here in NH.
Our roof was finished on Friday so I wanted to wait and take the finished transformation picture after that. I chose a black roof too.
I just love it!!

ruth V Weisrock
Love it. I just did our shutters black..classy!
Diana
Hi I wanted to know how they held up? I have 3 kids under 3 right now. So the idea of me needing to redo them often is well not the best, haha. Thank you
Sherri
They have held up perfect and still look the same as the day I did them. (besides a little dirty haha) I couldn’t be happier with how they turned out. I think the key is the primer/paint combo.
Vickie Hammer
Thank You !! I have been trying to decide for 4 months on a shutter color . The brick is a speckled tan and white . After seeing the black you did I’m so excited to start painting .
Autumn
Did you wash the shutters before painting?
Sherri
Hi! Yes, I damp wiped them down before painting and let them dry completely. You could spray them as well but it may take a little longer to dry. 🙂
Meg
I love this so much! Trying it out this weekend for sure. 🙂
Linda
All the reading I have been doing says you shouldn’t paint light shutters a darker color or they will warp in the heat. have you had this problem at all?
Sherri
I have not had that happen. Our shutters are metal and still look great. 🙂
Dawn Walker
NICE!!! Now I know how to take care of mine!!! Thanks!
Painting Paige
So adorable!!! What a fun way to add character to the outside of the house, totally obsessed 🙂
Shutters Sydney
You have done a fabulous job really.. that looks so beautiful and attractive too..
Dezmen Brown
That looks beautiful. I was using this same spray paint on my shutters as a primer. It came out so good and close the the color of my trim, that I decided to leave this as is. I was very impressed with the quality of the finish when I got done. Was very inexpensive to complete the job it only costed me 3.76 (per can) x 5(cans)= 18.80
Lauren
Hi! I am wondering how they have held up? I want to do ours and I figured that I would have to seal them to prevent bleeding. I’m in humid SC!!
Sherri
They have held up great Lauren! I am so happy with how they turned out. Not a single peeling spot anywhere. I think the key is in the primer/paint combo. They also get direct afternoon sun.
GenieJen
This looks amazing , I’d love shutters there so cute. I’m loving them in black, they look so chic. Yey you ! x